Digital Photography News and Digital Camera Reviews
Showing posts with label software. Show all posts

Photography 101: Digital Photo Formats

Although JPEG is the overwhelmingly popular choice for digital photo compression, there are several other options available that offer better image quality at the expense of higher file sizes.

Digital Photo Formats

The format of a digital photo depends on the type of compression used to store the image file. The letter at the end of the file name of a digital photo, something like ".jpg" or ".tiff" indicates the format in which your file has been saved. There have been numerous file formats throughout the history of digital photography but only a few have become the standard. The difference between the formats has to do with compression.

What is digital photo compression?

Compression is how digital device like computers and cameras reduce the size of a file by removing information that is unlikely to be noticed by the naked eye. Fine details and subtle gradations will be lost during compression and these changes will only be visible under strong magnification. Compression is required to make the size of digital photo files small enough for practical uses. More digital photos can be stored on a storage device when the size of each file is smaller.

What are common digital photo formats?

JPEG, which stands for Joint Photographic Experts Group, has become the industry standard for digital photo compression. Indicated by the .jpg file extension, JPEG achieves about 10 to 1 compression without much perceivable loss in image quality, making it ideal for digital photos. Most compact digital cameras offer only JPEG format for digital photo output, but more advanced cameras offer other choices like RAW and TIFF, which have their own advantages and disadvantages.

File Sizes and Digital Photo Formats

A typical 5 megapixel digital photo in JPEG format takes up about 2 MB on a memory card or hard drive. This means about 500 such photos can be stored on a 1 GB memory card. In comparison, a similar digital photo stored in the RAW format takes anywhere between 30-40 MB of space, meaning only 25 such photos can be stored on a 1 GB memory card. This difference in file size makes JPEG the popular choice for most consumers.

Disadvantage of the JPEG file format

JPEG looses quality each time a digital photo is edited or saved. This loss is a result of the compression used for JPEG digital photos. Therefore it is important to save a master copy of a digital photo and edit copies of that file. Alternatively, ‘lossless’ compression formats such as TIFF prevents quality degradation due to edits and saves. Advanced digital cameras allow photos to be saved in these formats right off the camera, or digital photo editing software can be used to convert JPEG formats to TIFF or RAW.

RAW and TIFF digital photo formats

RAW is the format for digital photos where absolutely no compression has been applied, meaning it preserves every bit of information captured by the image sensor of the digital camera used. With the obvious downside that file sizes can be massive for digital photos stored in the RAW format, it is the purest form available for digital photographs. Furthermore, a RAW image has to be saved in another format such as JPEG or TIFF once it has been edited or manipulated.

TIFF retains almost as much information as RAW, but is much smaller and allows for easy editing using software. TIFF is also good for retaining color information. Typical file sizes for TIFF digital photo files are in the 4 to 10 MB range compared to the 30 to 40 MB range for the RAW format.

Related Links

Image Types: JPEG & TIFF Files

Nikon Introduces Capture NX 2 Photo Editing Software

Nikon Inc. has introduced its latest digital photo processing and editing software, the Capture NX 2, providing powerful tools and user-friendly operation for digital photographers to enhance their digital images. A powerful complement to Nikon digital cameras, the Capture NX 2 nevertheless works as a standalone digital photo editing software with images captured from any camera in the most common formats.

Powerful New Tools Make Photo Editing Quick and Easy

MELVILLE, N.Y. (June 3, 2008) – Nikon Inc., today introduced the latest generation of its robust image processing and editing software, Capture NX 2, which provides photography enthusiasts with a suite of powerful tools and a simple, visual operation to streamline photo editing. Capture NX 2 utilizes revolutionary U Point® technology to give photographers access to powerful Control Points that enhance color, exposure, and other image quality settings quickly and easily. New technologies abound in Capture NX 2, including the innovative new Selection Control Point that places a commanding suite of image editing tools at the user’s fingertips to simplify and accelerate the image editing experience.

In addition, Capture NX 2 adds an advanced Auto Retouch Brush for seamless retouching, an improved yet simple user interface, updated menus, browser functionality and an increase in performance. Whether you choose JPEG, TIFF or RAW (NEF) files, Capture NX 2 is the perfect complement to the growing Nikon Digital System. It also offers advanced RAW (NEF) processing capabilities, simplified image-browsing, selection and labeling as well as improved batch-processing capabilities, superior color management and comprehensive system compatibility with Nikon’s EXPEED image processing concept.

“We have listened carefully to the requests of current Capture NX users and photographers in developing this powerful new software. This is an economical solution for the photographer who requires non-destructive image editing and wants to quickly and easily process their images,” said Michael Rubin, senior manager for Software Products at Nikon Inc. “With the addition of revolutionary new tools, photo enthusiasts as well as professionals will be able to reap the benefits of Capture NX 2.”

While providing incomparable editing options for Nikon’s Electronic Format RAW (NEF) files, Capture NX 2 enables simplified editing and processing for most JPEG and TIFF files regardless of camera manufacturer or model.* Its broad range of editing tools makes image retouching, enhancing and editing simple and intuitive, allowing users to immediately see the effects as they are applied. Whether a professional photographer, enthusiast or casual shutterbug, many will find Capture NX 2 to be a great stand-alone photo editing solution, while others will discover that Capture NX 2 is a remarkably effective addition to their existing photographic workflow.

New Additions to Capture NX 2

Capture NX 2 is complemented by a myriad of features and tools that include the following:
  • Selection Control Points: Now users can selectively edit photographs without the need to manually outline or mask the area for editing. Simply place a Selection Control Point anywhere on the photograph then choose from almost any adjustment such as D-Lighting, Unsharp Mask or noise reduction, while limiting the “reach” of that adjustment to just the selected area.
  • Auto Retouch Brush: Capture NX 2 adds an automatic retouch tool to its image editing toolbox, allowing users to seamlessly remove blemishes, dust, and other distracting elements from photographs while maintaining the integrity of the image.
  • Shadow/Highlight Adjustment: With just a simple slider adjustment, users can easily open up shadows or recover blown out highlights.**
  • Redesigned GUI with Customizable Workspaces: As part of an interface redesign, the new Capture NX 2 includes a Workspace feature that maximizes the tool and palette layout for the task at hand. Users can create unique custom workspaces ideal for working with single or multiple monitors. All palettes and windows within can be docked or undocked or hidden as needed. Predefined workspaces include: Browser, Metadata, Edit, or an optimized combination of each. In addition, users can access their most used folders with the new “Favorite Folder” feature.
  • Improved Edit List: Nikon’s Capture NX 2 also incorporates an improved edit list that allows users to apply common enhancements to images with ease. Common tools like tone curves, exposure compensation, contrast, and highlight and shadow protection are just a click away via the Quick Fix menu. The improved edit list allows for camera and lens corrections like color moirĂ© reduction, dust off, auto color aberration, auto red-eye correction, vignette control and fisheye lens correction.***
  • Simultaneous Use of Tools: Users can now complete image editing faster than ever before with the use of simultaneous tools. For example, users can adjust the brightness and contrast of an image while boosting the color of the image at the same time.
  • Filters, Ratings and Sorting Toolbar: Capture NX 2 offers an advanced filtering system in its tool bar, affording users an efficient way to filter through hundreds of images by user-defined labels, ratings, file types and file attributes. What’s more, these new filters, ratings and sorting tools are integrated into the metadata palette, allowing users the ability to easily edit and view XMP/IPTC information.
Nikon’s new Capture NX 2 software represents the core of Nikon’s integrated digital imaging systems, including cameras, lenses, software, speedlights and accessories, and allows photographers of all skill levels to experience the highest performance their Nikon equipment has to offer.

Capture NX 2 will be available for purchase throughout the United States in late June 2008 with a manufacturer’s suggested retail price of $179.95 (full version) or $109.95 (upgrade). A 60-day free trial version will be available today for users who wish to experience all that Capture NX 2 offers. For more information, and to download the 60-day trial version please visit www.nikonusa.com.

About Nikon

Nikon, At the Heart of the Image™. Nikon Inc. is the world leader in digital imaging, precision optics and photo imaging technology and is globally recognized for setting new standards in product design and performance for its award-winning consumer and professional photographic equipment. Nikon Inc. distributes consumer and professional digital SLR cameras, NIKKOR optics, Speedlights and system accessories; Nikon COOLPIX® compact digital cameras; COOLSCAN® digital film scanners; 35mm film SLR cameras; Nikon software products and Nikon sports and recreational optics. Nikon D Series digital SLR cameras are recognized as “Highest in Customer Satisfaction with digital SLR cameras,” according to the latest J.D. Power and Associates 2007 digital Camera Satisfaction Study. Nikon Corporation, the parent company of Nikon Inc., recently celebrated its 90th anniversary and announced the production of over 40 million NIKKOR SLR interchangeable lenses. For more information, dial (800) NIKON-UX or visit Nikon USA, which links all levels of photographers to the Web's most comprehensive photo learning and sharing communities.


*Some Capture NX 2 functions apply to NEF files only.
**Highlight Adjust supports RAW images, JPEG and TIFF, but is most effective for RAW images because they store additional highlight information.
***Fisheye Lens correction is only available when the image was captured using a fisheye lens.

Advanced Techniques - Producing HDR Images

High Dynamic Range (HDR) photography was once exclusively in the realm of video post production, but with the advent of digital photography and thanks to digital photo editing software, it is possible for average photographers to produce HDR images.

by Sam Zaydel


High Dynamic Range images are a fairly recent subject matter, at least as far as the average digital photographer is concerned. In case you are not familiar with HDR, it is the process of combining multiple exposures of the same subject into one image that more closely matches what the human eye sees. While HDR is primarily photography, it is considered to be a mixed medium art, because of the digital processing which takes place after the images have been captured. An HDR image is of course only as good as the sequence of images captured to produce the final image. There are several considerations that have to be made before capturing any images for HDR post-processing.

What is HDR?

First and foremost, let's talk about what HDR images are. Even though this is a fairly new subject in photography, the concept behind it is rather old. Dynamic Range simply put, is a measure of how many levels of light an image capture device, such as your digital camera, can capture. Think about shooting a bright sunrise. Why is it that when the sun is exposed properly, the rest of the image appears dark and underexposed? Simple, because the camera used to capture the image has less Dynamic Range than the scene being captured.

A sunrise is a high-contrast situation. The rising sun and the surrounding sky are hundreds of times brighter, than other elements in the image. While digital sensors are extremely sophisticated, and so are film emulsions, some scenes are still too much for them to render for bright highlights, and deep shadows. This is where the concept of an HDR image comes in. You know that if you shoot a sunrise, and meter for the sun, the rest of the scene will be dark, likewise if you meter for the rest of the scene, the sun and the sky will turn into a sheet of white.

What if you could bracket your exposures, but later take properly exposed portions of each exposure of a particular scene, and put them all together into a single beautifully exposed image? That's what an HDR image is.

Software

Using special software, such as Adobe Photoshop or Photomatix, you merge the exposures together, let the software generate a 48bit image, and you then tone map the image, meaning you adjust the image to make sure that both highlights and shadows are represented correctly.

Capturing Digital Photos for HDR

First and foremost, a tripod is absolutely necessary. Most serious photographers use a tripod despite having fast lenses, often with optical image stabilization. Secondly, while shooting a completely static scene is the most common method, dynamic scenes will produce beautiful HDR images too when shot correctly. The most important part of producing a good HDR image is spacing exposures correctly. I wish I could say: “Always bracket by 1.5 stops and you will have an excellent sequence!” That would be easy.

Bracket your images for HDRBracket your Images

Unfortunately, the spacing between exposures will vary, based on the scene. There is no limit, other than your computer's memory to how many exposures of the scene you use. Realistically, most situations will be covered by three exposures. Unless I can see that a scene has extreme variations in contrast, I will space the images 1½ or use a one-third stop if the camera offers it.

Always shoot in RAW format. Using RAW, I cheat at times, and underexpose or over expose a copy of one of the images in an HDR sequence. I then use this under, or overexposed image along with other 'real' photos to generate my final HDR composite image. Some cameras offer a custom setting, which you could program with any settings. I can always change the ISO, but I try to keep it at 50 to reduce noise. Remember, as you combine exposures, you also increase noise. Your choice of software will vary, and every image will look best at different settings. There is no one silver bullet here, you will have to use a lot of trial and error.

Final HDR ImageThe Final Image

Summary

To summarize, producing high quality HDR images is primarily in the exposures you make of the scene. Expose your primary shot for the part of the scene that is most important, and bracket other exposures from there. Try to capture fewer exposures at first, and study your final products to figure out what you need to do better. Experiment with exposure bracketing. Try different spacing, and with time you will find what works best for you. After all, even with HDR imaging, some people will choose to expose for more shadows, while others for more highlights. Try to streamline your image capture process with custom camera functions. There is a lot of information online about the available software, and the process itself. This article is a good start, and will hopefully get you on your way towards great HDR images. Nonetheless, use other resources, and experiment!

For more information read Produce HDR (High Dynamic Range) Images


About the Author: Sam Zaydel is a professional photographer, who recently started an Online Photographer Community, to allow photographers freedom to share their most favorite shooting locations and places. To learn more, please visit www.worldonpaper.com.

Secrets to Editing Digital Photography

Digital photo editors allow you to create and modify graphics and digital photographic images. This includes tasks such as painting and drawing, color correction, photo enhancement, creating special effects, converting images, and adding text to digital photographs. Your digital photo editor will probably be your most frequently used tool for working with graphics so it should be flexible and intuitive. Many software programs are available for enhancing and otherwise working with bitmap images, but unless they can perform all of the tasks above sufficiently, they should only be considered as companion tools to your primary digital photo editing application.

The best thing about digital cameras is that it's easy to take a lot of pictures. That is also the worst thing about digital cameras. After you've owned your camera for a few months, you will not be able to find that great picture you took a couple of months ago if your pictures aren't well organized or named logically. Folders are the best way to organize groups of pictures, and the My Pictures folder in Windows is a great place to start. In your My Pictures folder, create a sub-folder for each year: 2004, 2005, 2006, and so on. This might seem silly the first year you own your camera, but after five years, you'll be glad you did this because you can go back to your 2005 folder and easily find a picture from a vacation you took that year. Arranging pictures by year is also helpful if you're scanning older photos stored in shoe boxes or albums that you took before owning a digital camera. This is also a good way to start organizing the pictures that you currently have on your computer.

Digital Photo Editing Software

When it comes time to touch up your digital photos, you will need a digital photo editing software. You can choose a low-priced, consumer-oriented program or a high-priced program targeted at professional photographers. For most of us, the consumer-oriented digital photo editing programs are more than adequate-and, in fact, you might have received one with your computer or digital camera. Depending on what you do with your photos, you may not need a lot of the bells and whistles when it comes to photo editing. Explore your options and find out which software is best for you. If you're a beginner, you may be happy with a package that offers only the basics, like cropping and red-eye removal. Or, perhaps you need something with more creative effects. For the ultimate in photo-editing, you may consider investing in a professional editing suite. Be warned though, software like that is going to cost you. Adobe Photoshop, for instance, has become the industry standard among professional photographers everywhere. It allows functions like level adjustment, advanced compositing, and RAW image processing.

Digital Photo Sharpening Tools

Sharpen filters bring out detail in digital photographs by increasing the contrast of pixels next to one another. More advanced image editing programs offer several options such as Sharpen, Sharpen More, Sharpen Edges and Unsharp Mask (USM). Unsharp Mask gives you a lot of control over how an image is sharpened. Sometimes a digital photograph will benefit from selective sharpening. You select an area with a programs selection tool and only sharpen the area. The important thing is not sharpen an image too much. The Unsharp Mask searches through your image looking for where colors change, and sharpens those areas. The Unsharp Mask is superior to any other sharpening because it makes decisions based on adjacent pixels, not random color changes, so it usually can find and sharpen just the true edges of color areas.

Resizing Digital Photographs

Often times digital photographs are posted on the web and resized with HTML code. This leads to an image full of jagged edges. By resizing your image in a digital photo editing program, such as Adobe Photoshop, you can utilize smoothing algorithms that will make an image look much smoother. Additionally, resizing the image will reduce the file size, allowing a web page to load faster than usual. When you resize a digital photograph, you are resampling the image. In other words, your program is taking all of the image data and redrawing the pixels so that the image is the desired size. However, when you ask the application to increase the size of the image, the size of each pixel is increased, which inevitably leads to degradation of the image. You can also change image resolution when you resize the digital photograph to keep the quality of your image.

Digital Photograph Cropping

At times the subject of a picture is lost in the surrounding parts of a picture. If this happens, you can always crop your picture. This means cutting down the picture to a certain size. There are many ways to do this in terms of the size of cropping. In just about every digital photo editing program there is a cropping tool, and you can experiment with the size of the area that you take out of your digital photograph. If you don't like what you've done, all you have to do is click "undo."


Learn more about editing knowledge editing digital photography at Edit Your Digital Photos.

Digital Photo Editing Software

Digital photography inevitably involves the use of digital photo editing software to perform a variety of tasks in order to make your digital photos better. There are a variety of photo editing software available today, and each comes with its own set of tools and features. The prices on these digital editing software also vary widely.


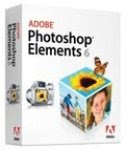
Adobe Photoshop Elements 6
Adobe Photoshop Elements 6 Digital Photo Editing Software
Adobe's Photoshop Elements is perhaps the best and most popular digital photo editing software. It is the consumer version of Adobe's industry standard Photoshop graphic design software. Photoshop Elements is one of the most powerful and sophisticated digital photo editing software available, and is priced at $99.99 (Adobe.com).


Corel Paint Shop Pro Photo X2
Corel's Paint Shop Pro Photo X2 digital photo editing software is a worthy competitor to Adobe's Photoshop Elements. Priced similarly with Elements, Corel's $79.99 (Corel.com) Paint Shop Pro X2 performs very well and has many intuitive tools and features to simplify your digital photo editing tasks.


Ulead PhotoImpact X3
Ulead's digital photo editing software - PhotoImpact X3 - is priced lower than Adobe's and Corel's offering at below $69.99 (Ulead.com), and has most of the features of its competitors.


Apple iPhoto
Mac owners have the highly capable Apple iPhoto digital photo editing software as their option. Offering a variety of tools for correcting and editing your digital photos. iPhoto also features an advanced photo organizer included. iPhoto is part of the iLife package, priced at $79 (Apple.com)


ACDSee Photo Editor
ACDSee's Photo Editor is the best in the crop of mid-range home digital photo editing software, priced affordably at $49.99 (ACDSee.com). It has all the basic features needed for everyday digital photo projects for the home photographer.


Google Picasa Digital Photo Editing Software
Google Picasa
Google's Picasa is first and foremost a digital photo organizing software, but its built in photo editor performs basic digital photo editing tasks seamlessly. Although it does not have advanced editing features, Picasa is very powerful in organizing your photo collection. Plus it is available free from Google.

Manipulating Your Digital Photographs

Editing digital photographs to achieve the end results you envision can be both a satisfying as well as frustrating experience. The different software and tools available may overwhelm the novice but with a little instruction and experience, manipulating you digital photographs can be a rewarding hobby.

by Jason Cox

Browsing through envelopes of prints fresh from the drug store and then tossing them into a picture drawing is not going to work anymore, thank heavens.

As you begin to develop a strategy for culling, editing, storing, organizing and most importantly enjoying the mountain of images you will soon face, keep in mind that the goal is to end up with an effective retrieval system, not just a storage system.

Never, ever edit your original images. Always work on copies. Archive the originals for safe keeping in their original format. Absolutely nothings gained by converting camera-fresh JPEGs to a lossless format until you begin editing them.

Most digital photographs deserve at least a trial pass through your photo editors auto-balance, instant fix or general enhancement feature.

If you are new to post-processing, you can begin to get a feel for what works and what does not by noting what adjustments your auto-balance made to the good, the bad and the ugly results. Even a suboptimal auto-balance result can be a good starting point for your manual adjustments.

Most digital cameras come with computer software to edit and to organize your images. These programs will assist you in correcting and manipulating the brightness, sharpness and color of your photos. The possibilities for image editing and manipulation are limitless once you become acquainted with the program.

With your software, you can crop the photos to remove unnecessary background images and focus on the subject of the picture itself. You can also adjust the contrast, brightness, and colors to make the photo more eye-catching and appealing. Removing red eye is also possible with these programs. Plus, you can enlarge or reduce your photos at the touch of a button.

If your camera did not come with a program, you will have to go buy one. We recommend Photoshop. Its the most widely used program out there and provides you with lots of options when working with your pictures.

Many experts say that you really should not stick to only the software that came with your camera. When there are so many different software programs out there, you owe it to yourself to play around with them and find one that will give you the effects you are looking for.

What specifically are we talking about? Well, the photo imaging software can help you make your pictures look wonderful and you will be proud to share them with friends and family! Consider the following:

First, cameras do not take square pictures, they take rectangular pictures. If you forgot to rotate the camera before snapping, its alright. Rotate the picture to the left or right by a 90 degree angle.

In the rush to take a picture, getting the camera perfectly level is not always possible. That adds up to a photo where the horizon is slightly askew. What you need in this case is to rotate the picture a degree at a time. This feature is probably somewhere in the Edit or Image menus. Look for an option to rotate the picture and enter a small value like 1 degree to the left or the right depending on which way you need to adjust.

We did say that cropping is a huge benefit with image software. When you took the picture of your daughter on the swing, once you view it on your computer, you realize that you did not zoom enough and theres more trees in the picture than your daughter.
Use the image editors cropping tool to cut away the unwanted part of the picture and isolate the subject.

In most programs, this tool is in the Tool menu and it might look like a picture frame. You will click on the image (after clicking on the Crop icon) and hold your cursor down as you draw inside the picture to get rid of the background and leave the subject intact.

If your photo is too dark, you can adjust the brightness to give it some life. Try using your image editors gamma control. This is a tool that is designed to brighten the darkest parts of the picture without over-exposing the parts that are already bright. You can usually find the gamma control in menus like Color or Image.

Using your cameras flash can sometimes cause dreaded red eye in your pictures. Many programs today have a one click correct of red eye. Look for red eye removal somewhere in the Effects menu.

If your program does not have this feature, try zooming in on the subjects face and using a coloring feature to match the color of their eyes. When you zoom back out, you probably will not be able to tell the difference - unless you painted brown eyed Suzy,s eyes blue!

You can also use image editing programs to add a caption to your photos. This is helpful if you want to identify the people in the picture, the location, or the date. Look for a text tool, which is often the letter A. When choosing a font, choose a fat one because skinny ones are often hard to read in a digital picture.

If you want to e-mail photos to someone, be considerate to the recipient by resizing it. If you attach a bunch of huge 3mp images to an e-mail message, you can bog down their inbox with a huge file. The message will take forever to send and receive.

The image editor will allow you to resize the picture - usually under the Image menu. 640 x 480 pixels is good for e-mailing. If your digital camera takes pictures at this size, you will not have to resize. Keep in mind too that some programs will automatically resize pictures that are being e-mailed - like Windows XP.

Most of your picture files are given a default name containing strange numbers and symbols. Rename your files when you go to save them so that they are easily identifiable. Renaming will also help you avoid over-writing any files when you download more pictures.

There are also some fun effects that can be found in software programs to make your photos more interesting. To add some spark to your digital photos, you may want to consider adding a stylistic border or edge around the photo. Instead of the traditional rectangular photo, artistic edges can make your pictures stand out from the rest. While many effects can be done with a lot of work with your digital photo editing software, some software packages can automate this process.

Play around with blurring and layering. The best part about working with imaging software is that theres always an Undo button if you do not like what you see. Clicking on Undo will take your picture back to where you were before you started editing.

Remember, though, we very strongly suggest that you manipulate only copies of your pictures instead of the originals. You do not want to take the chance of ruining the one copy you have of a cherished moment.

You can also use this software to make a picture look old. How do you do that? Here is a step by step process:
  1. Find a photo that works. Do not take a photo of your family next to a modern skyscraper. Great effects can be created with photos of country landscapes or of historical structures, such as cannons or log cabins.
  2. Give your colors a brownish tint. If you have a color balance tool, you can do this by turning your reds and yellows up at the expense of blues. Or, if your image software supports duotone, give your image a brownish tone.
  3. Reduce your images brightness and/or intensity. You want your photograph old and weathered and such images should not look bright and sunny.
  4. Choose an Add Noise filter, if you have one, to your image. Most software programs should have this option.
  5. Use your photo softwares Dust and Scratch tool, if applicable.
  6. For a truly weathered look, see if your photo software has a rain, snow, or fog filter. Apply a few touches to the photograph to make it seem like it has seen better days.
In fact, digital photography opens up a whole new world for your memory preservation. Consider scrapbooking to save your photos.

Article Source: http://www.artsymmetry.com